
[Spring] 게시판 만들기 - 데이터 조회/수정/삭제
이 게시물은 이동욱님의 “스프링 부트와 AWS로 혼자 구현하는 웹 서비스”를 읽고 공부하며 작성한 게시물입니다.
게시글 조회
Get 요청을 보내 서버로부터 작성한 특정 게시물을 가져오는 API를 만들어보자.
데이터베이스 -> Repository -> (Entity) -> Service -> (dto로 변환) -> Controller를 거쳐 우리가 보낸 요청에 맞는 데이터가 호출될 것이다.
이번에는 요청을 제일먼저 받는 Controller부터 작성해보도록 하자.
Contoller
springboot/web/PostsController
1
2
3
4
5
6
7
8
9
10
11
12
13
14
15
16
@RequiredArgsConstructor
@RestController
public class PostsApiController {

    private final PostsService postsService;

    @PostMapping("/api/v1/posts")
    public Long save(@RequestBody PostsSaveRequestDto requestDto) {
        return postsService.save(requestDto);
    }

        @GetMapping("/api/v1/posts/{id}")
    public PostsResponseDto findById(@PathVariable Long id) {
        return postsService.findById(id);
    }
}
PostsController에 @GetMapping()으로 조회 요청을 받을 주소를 작성해주자.
여기서 id 부분이 {}로 감싸져있는데, 이는 주소에 있는 문자를 이 함수에 매개변수로 사용할 수 있게 해주는 기호이다. 이렇게 중괄호로 감싸주고 매개변수 앞에 @PathVarialble 어노테이션을 사용하면 중괄호 안에있는 id가 findById 메서드의 매개변수인 id로 매칭된다. 만약 1번 게시물을 조회 하고싶다면, /api/v1/posts/1의 주소에 Get요청을 보내면 @PathVariable이 1을 id로 넘겨주는 것이다.
Service
springboot/service/posts/PostsService
1
2
3
4
5
6
7
8
9
10
11
12
13
14
15
16
17
18
@RequiredArgsConstructor
@Service
public class PostsService {

    private final PostsRepository postsRepository;

    @Transactional
    public Long save(PostsSaveRequestDto requestDto) {
        return postsRepository.save(requestDto.toEntity()).getId();
    }

    @Transactional
    public PostsResponseDto findById (Long id) {
        Posts entity = postsRepository.findById(id)
                .orElseThrow(() -> new IllegalArgumentException("해당 게시글이 없습니다 id =" +id));
        return new PostsResponseDto(entity);
    }
}
이제 Controller로 들어온 id를 Service 클래스에서 받아 Repository에서 해당 id에 맞는 데이터를 꺼내온다. 이렇게 꺼내온 데이터를 마찬가지로 Dto에 담아서 반환해준다. 응답에 대한 Dto이므로 또 새로운 Dto인 PostsResponseDto를 만들어주자. 앞으로 어떤 요청에 대해서 응답이 필요하다면, 데이터를 PostsResponseDto에 담아 반환해줄 것이다.
springboot/web/dto/PostsResponseDto
1
2
3
4
5
6
7
8
9
10
11
12
13
@Getter
public class PostsResponseDto {
    private String title;
    private String content;
    private String author;

    @Builder
    public PostsResponseDto(Posts entity) {
        this.title = entity.getTitle();
        this.content = entity.getContent();
        this.author = entity.getAuthor();
    }
}
이렇게 하면 데이터를 조회하는 기능이 완성 되었다. 다시 정리해보자면,
api/v1/posts/1로 Get 요청을 보내면, 이를 GetMapping 어노테이션에 의해 id인 1을 Controller로 넘겨주고 PostsApiController는 이를 PostsService로 넘긴다. 그러면 Service는 이를 PostsRepository에게 전달해 해당 id에 맞는 데이터를 찾아오도록한뒤, 이를 PostsResponseDto에 담아 반환한다.
그럼 이제 서버를 재동작 시킨 후, 저번 게시물에서 만들었던 Post요청을 보내고 이를 조회해보자.
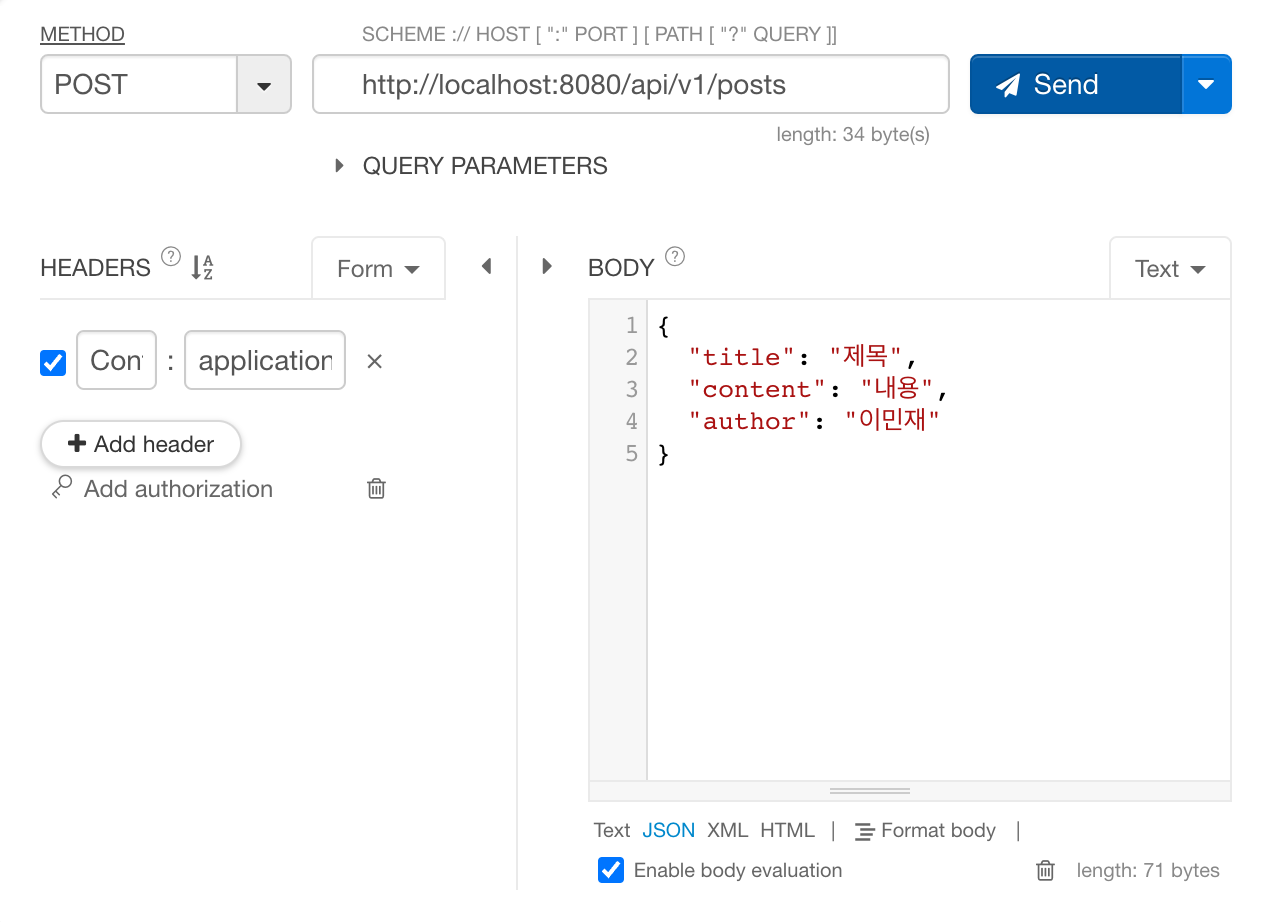
만들고 싶은 새 게시글의 정보를 담아서 Post 요청을 보내 게시글을 만든 뒤,
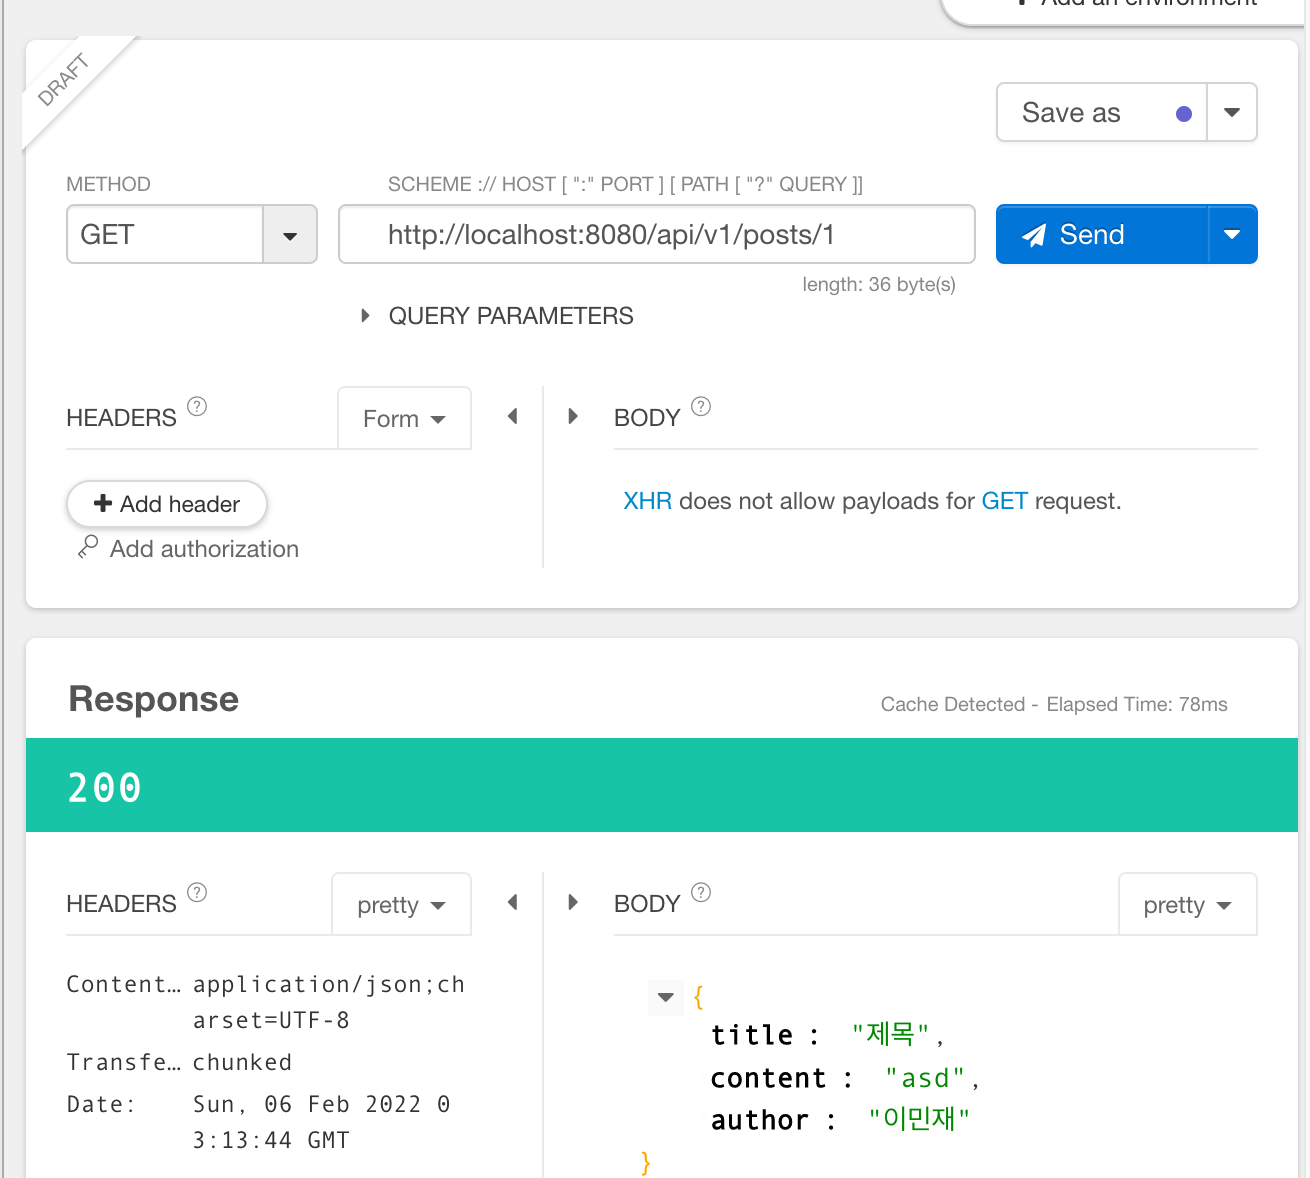
Get요청을 api/v1/posts/1로 보내면 위 사진과 같이 올바른 응답과 함께 아까 작성했던 게시글의 데이터를 불러오는 것을 알 수 있다.
게시글 수정
이번에는 Patch 요청을 보내 서버로부터 작성한 특정 게시물을 수정하는 API를 만들어보자.
조회 기능과 동일하게 Controller 부터 작성해보자.
Contoller
springboot/web/PostsController
1
2
3
4
5
6
7
8
9
10
11
12
13
14
15
16
17
18
19
20
21
@RequiredArgsConstructor
@RestController
public class PostsApiController {

    private final PostsService postsService;

    @PostMapping("/api/v1/posts")
    public Long save(@RequestBody PostsSaveRequestDto requestDto) {
        return postsService.save(requestDto);
    }

        @GetMapping("/api/v1/posts/{id}")
    public PostsResponseDto findById(@PathVariable Long id) {
        return postsService.findById(id);
    }

    @PatchMapping("/api/v1/posts/{id}")
    public Long update(@PathVariable Long id, @RequestBody PostsUpdateRequestDto requestDto) {
        return postsService.update(id, requestDto);
    }
}
마찬가지로 @PathVariable을 사용해 주소로부터 수정할 게시물의 id를 받아오고, 수정할 내용도 받아와야하므로, @RequestBody를 사용해서 변경요청 사항을 Json으로 받아오도록 하자. 이번에는 PostsUpdateRequestDto에 해당 Json 데이터를 받아 Dto로 Service에 전달할건데, 변경이라면 제목과 내용만 변경하고 작성자는 변경할 필요가 없으므로 PostsUpdateRequestDto에는 title과 content만 존재해도 된다.
springboot/web/dto/PostsResponseDto
1
2
3
4
5
6
7
8
9
10
11
12
@Getter
@NoArgsConstructor
public class PostsUpdateRequestDto {
    private String title;
    private String content;

    @Builder
    public PostsUpdateRequestDto(String title, String content) {
        this.title = title;
        this.content = content;
    }
}
마찬가지로 이렇게 만든 dto와 함께 id를 받아 Service로 넘긴 뒤 처리해준다.
Service
springboot/service/posts/PostsService
1
2
3
4
5
6
7
8
9
10
11
12
13
14
15
16
17
18
19
20
21
22
23
24
25
26
27
28
@RequiredArgsConstructor
@Service
public class PostsService {

    private final PostsRepository postsRepository;

    @Transactional
    public Long save(PostsSaveRequestDto requestDto) {
        return postsRepository.save(requestDto.toEntity()).getId();
    }

    @Transactional
    public PostsResponseDto findById (Long id) {
        Posts entity = postsRepository.findById(id)
                .orElseThrow(() -> new IllegalArgumentException("해당 게시글이 없습니다 id =" +id));
        return new PostsResponseDto(entity);
    }

    @Transactional
    public Long update(Long id, PostsUpdateRequestDto requestDto) {
        Posts entity = postsRepository.findById(id)
                .orElseThrow(() -> new IllegalArgumentException());

        entity.update(requestDto.getTitle(), requestDto.getContent());

        return postsRepository.save(entity).getId();
    }
}
조회와 마찬가지로 우선 수정할 데이터가 있는지 Repository를 통해 조회 해준다. 만약 해당 id에 해당하는 게시물이 없다면, IllegalArgumentException을 출력한다. 이렇게 조회해온 Entity를 update 함수를 통해 직접 변경해준다. 그리고 변경한 Entity를 다시 Repository를 통해 저장해주면 변경이 완료 된다.
springboot/web/dto/PostsUpdateDto
1
2
3
4
5
6
7
8
9
10
11
12
13
14
15
16
17
18
19
20
21
22
23
24
25
26
27
28
29
@Getter
@NoArgsConstructor
@Entity
public class Posts{

    @Id
    @GeneratedValue(strategy = GenerationType.IDENTITY)
    private Long id;

    @Column(length = 500, nullable = false)
    private String title;

    @Column(columnDefinition = "TEXT", nullable = false)
    private String content;

    private String author;

    @Builder
    public Posts(String title, String content, String author) {
        this.title = title;
        this.content = content;
        this.author = author;
    }

    public void update(String title, String content) {
        this.title = title;
        this.content = content;
    }
}
Entity 클래스에 update라는 메서드를 만들어서 새로운 정보로 해당 엔티티를 변경할 수 있도록 해주면, 이제 해당 주소로 Patch 요청을 보내면 이제 id에 해당하는 게시물을 변경할 수 있다.

변경 요청을 Patch로 Json 데이터와 함께 보내면,

변경된 요청이 올바르게 적용된 것을 확인할 수 있다.
게시글 삭제
이번에는 Delete 요청을 보내 서버로부터 작성한 특정 게시물을 삭제하는 API를 만들어보자.
Contoller
springboot/web/PostsController
1
2
3
4
5
6
7
8
9
10
11
12
13
14
15
16
17
18
19
20
21
22
23
24
25
26
@RequiredArgsConstructor
@RestController
public class PostsApiController {

    private final PostsService postsService;

    @PostMapping("/api/v1/posts")
    public Long save(@RequestBody PostsSaveRequestDto requestDto) {
        return postsService.save(requestDto);
    }

    @GetMapping("/api/v1/posts/{id}")
    public PostsResponseDto findById(@PathVariable Long id) {
        return postsService.findById(id);
    }

    @PatchMapping("/api/v1/posts/{id}")
    public Long update(@PathVariable Long id, @RequestBody PostsUpdateRequestDto requestDto) {
        return postsService.update(id, requestDto);
    }

    @DeleteMapping("/api/v1/posts/{id}")
    public Long delete(@PathVariable Long id) {
        return postsService.delete(id);
    }
}
마찬가지로 @PathVariable 어노테이션을 사용해서 주소의 id 값을 id변수로 받아온 뒤, Service로 넘겨준다.
Service
springboot/service/posts/PostsService
1
2
3
4
5
6
7
8
9
10
11
12
13
14
15
16
17
18
19
20
21
22
23
24
25
26
27
28
29
30
31
32
33
34
35
36
37
@RequiredArgsConstructor
@Service
public class PostsService {

    private final PostsRepository postsRepository;

    @Transactional
    public Long save(PostsSaveRequestDto requestDto) {
        return postsRepository.save(requestDto.toEntity()).getId();
    }

    @Transactional
    public PostsResponseDto findById (Long id) {
        Posts entity = postsRepository.findById(id)
                .orElseThrow(() -> new IllegalArgumentException("해당 게시글이 없습니다 id =" +id));
        return new PostsResponseDto(entity);
    }

    @Transactional
    public Long update(Long id, PostsUpdateRequestDto requestDto) {
        Posts entity = postsRepository.findById(id)
                .orElseThrow(() -> new IllegalArgumentException());

        entity.update(requestDto.getTitle(), requestDto.getContent());

        return postsRepository.save(entity).getId();
    }

    @Transactional
    public Long delete(Long id) {
        Posts entity = postsRepository.findById(id)
                .orElseThrow(() -> new IllegalArgumentException("존재하지 않는 id의 게시글입니다."));
        postsRepository.deleteById(id);
        return entity.getId();

    }
}
Service에는 delete 메서드를 만들어준다. 먼저 해당 id의 데이터가 데이터 베이스에 존재하는지 Repository의 findById()를 통해서 확인해주고, 만약 해당 id의 데이터가 존재하지 않는다면 예외를 출력한다. 만약 예외를 출력하지 않았다면 Repository는 해당 데이터를 삭제한다.
이제 해당 게시물의 주소로 DELETE 요청을 보내면,
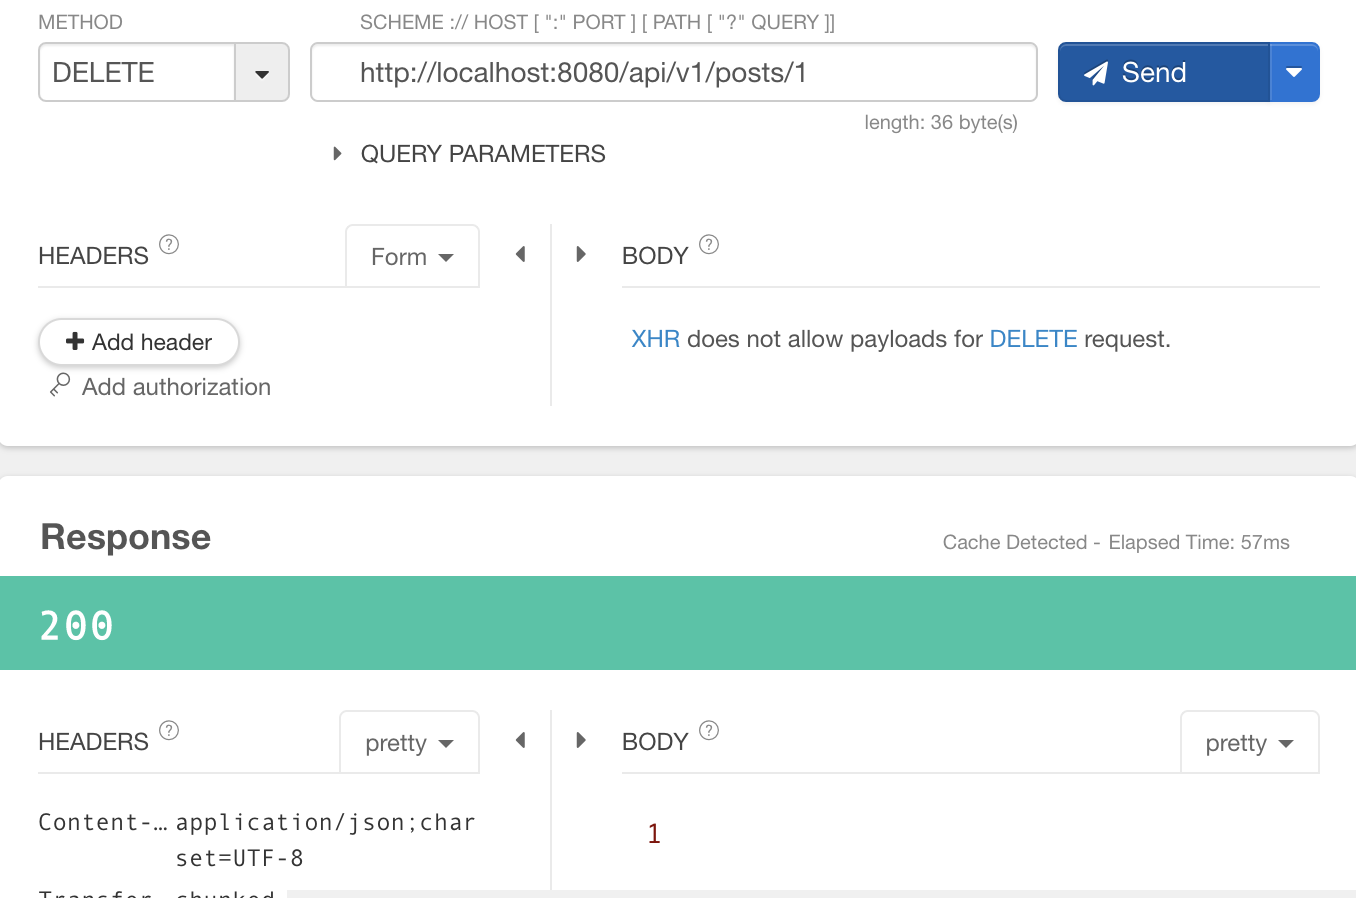
위 게시물과 같이 정상적으로 삭제 응답을 처리한것을 확인 할 수 있다.
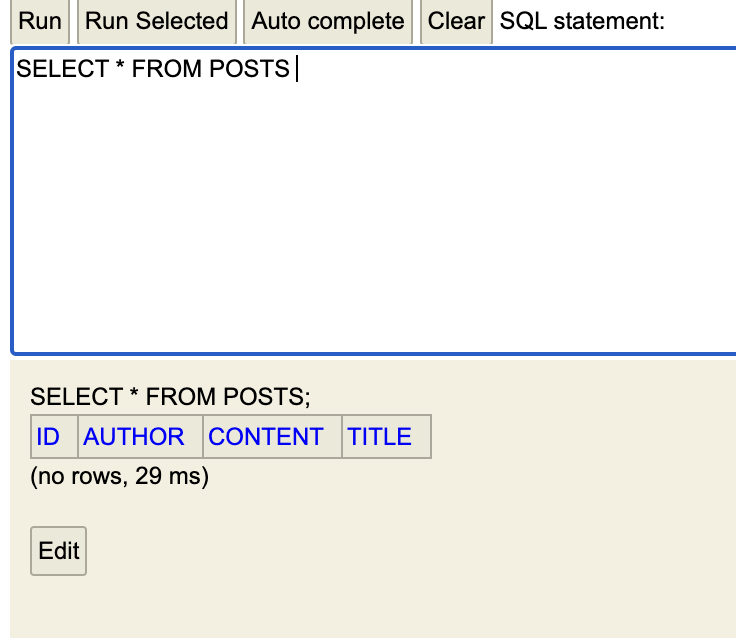
h2-console 에서도 데이터가 올바르게 삭제되었다.
댓글남기기